Imagine the peace of mind knowing your outdoor security cameras are vigilantly watching over your property, providing crisp, clear footage whenever you need it. But what happens when that crucial Wi-Fi signal flickers, leaving you with blurry images, frustrating disconnections, or worse—blind spots? A weak Wi-Fi signal for outdoor security cameras is more than just an inconvenience; it’s a security vulnerability. Ensuring robust and reliable connectivity is paramount for any surveillance system to function effectively, delivering the consistent protection you depend on.
This comprehensive guide will delve into the common culprits behind poor outdoor Wi-Fi, offering practical, actionable strategies and hardware solutions to dramatically improve your Wi-Fi signal, ensuring your security cameras always deliver optimal performance and unwavering vigilance.
Understanding Wi-Fi Signal Weakness for Outdoor Security Cameras
A weak Wi-Fi signal is often the root cause of many outdoor security camera issues, from intermittent connectivity to pixelated video. Understanding what constitutes a “weak” signal and the underlying factors that compromise it is the first step toward a robust solution.
What is a Weak Wi-Fi Signal?
|
Our Picks for the Best Security Camera in 2026
As an Amazon Associate I earn from qualifying purchases.
|
||
| Num | Product | Action |
|---|---|---|
| 1 | 2K Cameras for Home Security-Outdoor/Indoor Camera for Dog/Cat/Pet/Nanny/Baby/Elderly, Color Night Vision, White Light, Siren, 24/7 SD Recordings, Works with Alexa, Plug in (C1-White-2pack-2.4G) |

|
| 2 | Tapo 1080P Indoor Pan/Tilt Wired Security Camera - Works as a Baby & Pet Monitor, Motion Detection, 2-Way Audio, Siren, Night Vision, Subscription-Free Local Storage or Optional Cloud, Black, C201 |
|
| 3 | Google Nest Cam with Floodlight - Outdoor Camera - Floodlight Security Camera, White, 1 Count (Pack of 1) |
|
| 4 | Google Nest Cam Outdoor (Wired, 2nd Gen) - 2 Pack - Security Camera with 2K Video and Gemini, Night Vision, 2-Way Audio - Works with Google Home - 2025 Model - Snow |
|
| 5 | aosu Security Cameras Outdoor Wireless, 4 Cam-Kit, No Subscription, Solar-Powered, Home Security Cameras System with 360° Pan & Tilt, Auto Tracking, 2K Color Night Vision, Easy Setup, 2.4 & 5GHz WiFi |
|
| 6 | Tapo 2K+ Indoor/Outdoor Wired Security Camera - 2024 PCMag Editors' Choice, Person/Pet/Vehicle Detection, Baby Monitoring, Color Night Vision, Subscription-Free Local Storage or Optional Cloud, C120 |
|
| 7 | WYZE Bulb Cam Security Camera, 2K HD Outdoor Light Bulb Camera, Color Night Vision, Dimmable LED Bulb, Motion Detection, Siren Alarm, Works w/Alexa/Google Assistant. Free Expert Support |
|
| 8 | 2K No Drill Window Camera-2 Pack 2.4Ghz & 5Ghz WiFi Cameras for Home Security for Indoor & Outdoor Monitoring, Anti-Glare Color Night Vision, Human Detection, 24/7 Recording, Ideal for Apartment, K1 |
|
| 9 | WYZE Cam Pan v3 Indoor/Outdoor IP65-Rated 1080p Pan/Tilt/Zoom Wi-Fi Smart Home Security Camera with Color Night Vision, 2-Way Audio, Compatible with Alexa & Google Assistant, White, 2-Pack |
|
| 10 | TP-Link Tapo 1080P Indoor Security Camera for Baby Monitor, Dog Camera w/Motion Detection, 2-Way Audio Siren, Night Vision, Cloud & SD Card Storage, Works w/Alexa & Google Home (Tapo C100) |
|
Wi-Fi signal strength is typically measured in decibels per milliwatt (dBm), a negative number where values closer to zero indicate a stronger signal (e.g., -30 dBm is excellent, -70 dBm is barely usable). For outdoor security cameras, a consistently strong signal, ideally in the -30 dBm to -50 dBm range, is essential for high-definition video streaming and seamless operation. Symptoms of a weak signal include constant buffering, frequent disconnections, sluggish live views, and a significant drop in video quality, rendering your security camera less effective.
Factors Affecting Outdoor Wi-Fi Signal
Several elements can conspire to weaken your outdoor Wi-Fi signal, turning a robust indoor network into a barely perceptible whisper outside:
- Distance from Router: Wi-Fi signals degrade naturally over distance. The further your outdoor security camera is from your primary router, the weaker the signal will be.
- Physical Obstructions: Walls, especially thick concrete or brick, metal siding, large appliances, trees, and even bodies of water like swimming pools or fish tanks, can absorb or block Wi-Fi signals. Each obstacle your signal must penetrate significantly weakens it.
- Interference: Other wireless devices operating on the same frequency (e.g., microwaves, cordless phones, Bluetooth devices, and even neighbor’s Wi-Fi networks) can create interference, causing signal degradation and dropped connections for your outdoor security camera.
- Router Age and Capabilities: Older routers may lack the power, antenna quality, or advanced features (like beamforming) found in newer models, struggling to provide adequate outdoor coverage.
- Frequency Band (2.4GHz vs 5GHz): The 2.4GHz band offers a longer range and better penetration through obstacles, making it generally more suitable for outdoor security cameras. The 5GHz band provides faster speeds but has a shorter range and is more easily obstructed.
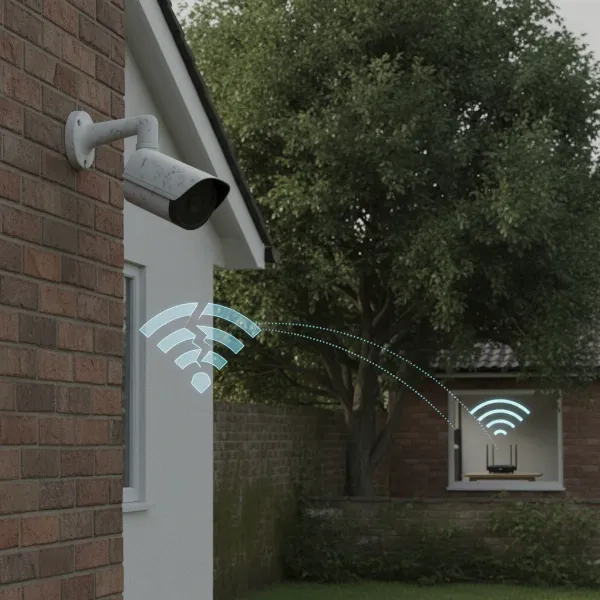 Visualizing weak Wi-Fi signal, showing outdoor camera struggling with obstacles and distance from router.
Strategic Placement: Optimizing Your Existing Setup
Before investing in new hardware, optimizing the placement of your current Wi-Fi router and outdoor security cameras can often yield significant improvements in signal strength.
Router Placement is Key
Your Wi-Fi router is the heart of your home network, and its placement critically impacts the signal reaching your outdoor cameras.
- Central and Elevated: Position your router in a central location within your home, preferably on an upper floor if you have multiple levels. Elevating the router (e.g., on a high shelf) helps the signal radiate outwards more effectively, minimizing interference from ground-level obstructions.
- Line of Sight: Strive for a direct line of sight between your router and your outdoor security cameras. Even one fewer wall or obstruction can make a big difference. Avoid hiding your router in cabinets, behind TVs, or in closets, as these enclosures can severely dampen the signal.
- Avoid Obstructions: Keep your router away from common signal blockers like large metal objects, concrete walls, mirrors, large aquariums, or other electronic devices that emit radio frequencies (microwaves, cordless phones).
- Antenna Orientation: If your router has adjustable antennas, position them vertically to maximize the horizontal spread of the Wi-Fi signal, which is generally best for reaching devices on the same plane or slightly above/below.
Camera Placement Considerations
The location of your outdoor security cameras also plays a vital role in connectivity. Even with a strong router signal, poor camera placement can lead to weak links.
- Minimize Distance: Install cameras as close as possible to the router or any signal-boosting devices you employ. Test the signal strength at potential mounting locations before final installation.
- Elevate Cameras: Similar to your router, mounting cameras higher up (e.g., under eaves or on a second-story wall) can provide a clearer path for the signal, reducing interference from ground-level foliage or landscaping.
- Consider Camera Antennas: Some outdoor security cameras come with external, adjustable antennas. Ensure these are positioned optimally for reception, often pointing towards the router.
Enhancing Your Network Hardware
When optimal placement isn’t enough, upgrading or adding specific hardware can bridge the signal gap and supercharge your outdoor security camera’s connectivity.
Wi-Fi Extenders and Repeaters
Wi-Fi extenders and repeaters are cost-effective solutions to expand your network’s reach. They capture your existing Wi-Fi signal and rebroadcast it, effectively extending the coverage area. Place the extender strategically where your primary router’s signal is still strong but before the signal drops off for your outdoor security camera. While often used interchangeably, an extender creates a new network name (SSID), whereas a repeater typically uses the same SSID to seamlessly extend the network.
Mesh Wi-Fi Systems
For larger homes, properties with complex layouts, or multiple outdoor security cameras, a mesh Wi-Fi system is an excellent investment. These systems consist of multiple nodes that work together to create a unified, seamless Wi-Fi network throughout your entire property. They intelligently route traffic, ensuring your outdoor cameras always connect to the node with the strongest signal, eliminating dead zones and providing consistent performance.
Outdoor Wi-Fi Access Points (APs)
Designed specifically for external use, outdoor Wi-Fi access points are weatherproof devices that can be installed directly outside, much closer to your outdoor security cameras. These dedicated units provide robust Wi-Fi coverage for yards, patios, and driveways, bypassing the signal attenuation caused by interior walls. They typically connect to your main network via an Ethernet cable, which can be run underground or along exterior walls for a discreet and stable connection.
Powerline Adapters
Powerline adapters utilize your home’s existing electrical wiring to transmit network data. One adapter plugs into an indoor electrical outlet near your router and connects via Ethernet. A second adapter plugs into an outdoor-rated electrical outlet (under a covered patio or in a weatherproof box) closer to your outdoor security camera. This second adapter then broadcasts a Wi-Fi signal, effectively extending your network without running long Ethernet cables outdoors. Remember, the outdoor component must be properly weatherproofed.
Upgrading High-Gain Antennas
If your router or outdoor security camera features detachable antennas, consider upgrading to high-gain alternatives. These antennas are designed to focus the Wi-Fi signal in a specific direction, significantly boosting reception and range. Directional antennas are particularly useful for outdoor cameras that are far away and in a consistent direction from your router, while omni-directional high-gain antennas offer improved coverage in all directions.
Dedicated Camera Base Stations
Some outdoor security camera systems, like certain Wyze models, connect to a dedicated base station that then links to your home Wi-Fi. If this is your setup, consider relocating the base station. Moving it closer to the outdoor cameras, especially if it can be placed near a window or an external wall facing the cameras, can significantly improve their connection stability and signal strength.
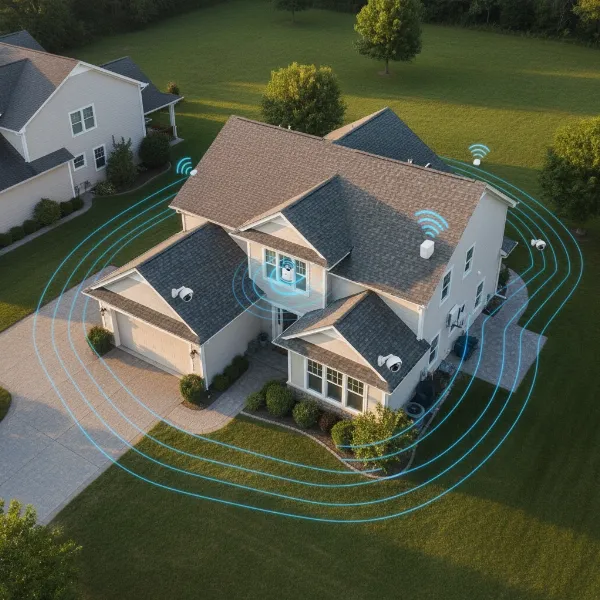 Illustration of various Wi-Fi hardware like extenders, mesh nodes, and outdoor APs boosting signal for outdoor cameras.
Advanced Network Optimization Techniques
Beyond hardware upgrades, fine-tuning your network settings can further enhance the Wi-Fi signal for your outdoor security cameras.
Optimizing Wi-Fi Channel Settings
In densely populated areas, multiple Wi-Fi networks can compete for bandwidth on the same channels, leading to congestion and interference. Access your router’s settings and use a Wi-Fi analyzer app (available for smartphones) to identify the least congested channels on both the 2.4GHz and 5GHz bands. Switching to a less crowded channel can dramatically improve stability and speed for your outdoor security cameras. Remember that the 2.4GHz band generally offers better range and penetration for outdoor use, while 5GHz offers faster speeds at a shorter range.
Firmware Updates
Regularly updating the firmware on both your Wi-Fi router and your outdoor security cameras is crucial. Firmware updates often include performance enhancements, bug fixes, and security patches that can improve connectivity and overall system stability. Check the manufacturer’s website for the latest firmware versions and follow their instructions carefully for updating your devices.
Minimizing Interference
Actively identify and reduce sources of interference. Keep your router and cameras at least three feet away from other electronics like microwaves, cordless phones, baby monitors, and large metal appliances. If possible, consider changing the channels on these other devices if they offer that option.
Quality of Service (QoS)
Many modern routers offer Quality of Service (QoS) settings. Enabling QoS allows you to prioritize network traffic for specific devices or applications. By prioritizing your outdoor security cameras, you can ensure they receive sufficient bandwidth for smooth video streaming, even when other devices on your network are heavily in use.
Troubleshooting Common Wi-Fi Issues
Sometimes, the simplest solutions are the most effective. Here are quick troubleshooting steps for persistent Wi-Fi issues with your outdoor security camera:
- Restarting Devices: A simple reboot of your Wi-Fi router and the security camera itself can often resolve temporary glitches and refresh network connections.
- Checking Network Credentials and Compatibility: Double-check that your outdoor security camera is connected to the correct Wi-Fi network and that the password is entered accurately. Ensure your camera is compatible with your router’s Wi-Fi standards (e.g., Wi-Fi 4/N, Wi-Fi 5/AC, Wi-Fi 6/AX).
- Testing Signal Strength: Use a Wi-Fi analyzer app on your smartphone or a dedicated Wi-Fi signal meter to test the actual signal strength at your camera’s location. This will give you concrete data to assess the effectiveness of your signal improvement efforts.
- Addressing Network Congestion: If you have many devices on your network, consider disconnecting non-essential ones temporarily to see if camera performance improves. This can help pinpoint if congestion is the primary problem.
Conclusion
Achieving a strong and stable Wi-Fi signal for your outdoor security cameras is fundamental to maintaining an effective home surveillance system. By strategically optimizing your router and camera placement, leveraging powerful hardware like Wi-Fi extenders, mesh systems, or outdoor access points, and fine-tuning your network settings, you can overcome common connectivity challenges. Proactive measures, such as regular firmware updates and minimizing interference, ensure your outdoor security cameras deliver reliable, high-quality footage day in and day out. A robust Wi-Fi connection safeguards your security investment, providing unwavering peace of mind.
What further steps will you take today to ensure your outdoor security cameras have the signal strength they need to protect what matters most?
Frequently Asked Questions
How far can an outdoor security camera be from Wi-Fi?
The effective range of an outdoor security camera from your Wi-Fi router varies greatly depending on the router’s power, environmental obstructions like walls and trees, and the camera’s antenna quality. Generally, for a stable connection and high-quality video, aim for within 50-100 feet (15-30 meters) if passing through a few walls, though dedicated outdoor access points can extend this significantly further.
Do Wi-Fi extenders work well with security cameras?
Yes, Wi-Fi extenders can work very well with outdoor security cameras by amplifying the existing Wi-Fi signal and rebroadcasting it to reach areas with weak coverage. For best results, place the extender halfway between your router and the camera, ensuring the extender itself receives a strong signal from the main router.
Should I use 2.4GHz or 5GHz for my outdoor camera?
For most outdoor Security Cameras, the 2.4GHz Wi-Fi band is generally recommended. While slower, it offers a longer range and better penetration through obstacles like walls, trees, and other outdoor structures. The 5GHz band provides faster speeds but has a shorter range and is more susceptible to interference and blockage.
What causes poor Wi-Fi signal to outdoor cameras?
Poor Wi-Fi signals to outdoor cameras are primarily caused by distance from the router, physical obstructions such as thick walls, metal objects, and dense foliage, and interference from other wireless devices or neighboring networks. An outdated router or unoptimized network settings can also contribute to weak connectivity.