A security camera is your vigilant eye, protecting your home or business 24/7. But what happens when that eye gets blurry? Dust, grime, fingerprints, and environmental residue can quickly obscure your camera lens, turning crystal-clear surveillance into hazy, ineffective footage. Maintaining a pristine lens is not just about aesthetics; it’s crucial for the optimal performance and longevity of your security system. This comprehensive guide, crafted from over a decade of hands-on experience in security camera systems, will walk you through the precise steps and essential tools to clean your security camera lens without risking a single scratch.
Why a Clean Security Camera Lens Matters for Optimal Performance
The lens is the most critical component of any security camera, directly impacting the quality of the images or video it captures. Over time, environmental exposure causes various particles—from dust and pollen to bird droppings and industrial pollutants for outdoor cameras, or fingerprints and indoor grime for indoor units—to accumulate on the lens surface. This buildup doesn’t just look bad; it significantly degrades image quality, leading to blurry, hazy, or obscured footage that can render your surveillance ineffective. Unclear video reduces the ability to identify faces, license plates, or crucial details, compromising your security system’s primary purpose. Furthermore, microscopic particles and persistent residues can abrade delicate lens coatings, leading to permanent damage and potentially shortening your camera’s operational lifespan. Regular, careful cleaning is essential to preserve image clarity and ensure your security investment continues to function reliably.
Essential Tools and Materials for Scratch-Free Lens Cleaning
Ensuring a scratch-free cleaning process starts with having the right tools. Using improper materials or harsh chemicals can do more harm than good, potentially damaging delicate lens coatings or creating permanent scratches.
What You’ll Need: A Prepared Cleaning Kit
Invest in a dedicated lens cleaning kit to protect your valuable equipment. Here are the indispensable items:
- Air Blower (Rocket Blower): A hand-held rubber bulb that provides a powerful blast of air to dislodge loose dust and debris without physical contact. This is crucial as a first step to prevent scratching.
- Soft Lens Brush: A fine-bristled brush, often retractable, designed for gently sweeping away larger particles or debris from the lens surface and crevices that an air blower might miss.
- Microfiber Cleaning Cloths: These are soft, lint-free, and highly effective at trapping dust, oils, and smudges without leaving scratches. Opt for cloths specifically designed for optics, and ensure they are clean before each use.
- Specialized Lens Cleaning Solution: A liquid formulated for optical surfaces, ensuring thorough cleaning without harming lens coatings or leaving streaks. Always apply this solution to your microfiber cloth, never directly to the lens.
- Lens Cleaning Pen (Optional but Recommended): A compact tool featuring a soft brush on one end and a carbon-based cleaning tip on the other. It’s excellent for tackling stubborn smudges or fingerprints.
- Pre-moistened Lens Wipes: Individually wrapped, single-use wipes like those from Zeiss are convenient for quick clean-ups and are safe for coated lenses.
- Safety Gear: For cameras mounted high, a stable ladder or a dedicated security camera cleaning pole is necessary to safely reach and clean without risk of injury or camera damage.
|
Our Picks for the Best Security Camera in 2026
As an Amazon Associate I earn from qualifying purchases.
|
||
| Num | Product | Action |
|---|---|---|
| 1 | Tapo 1080P Indoor Pan/Tilt Wired Security Camera - Works as a Baby & Pet Monitor, Motion Detection, 2-Way Audio, Siren, Night Vision, Subscription-Free Local Storage or Optional Cloud, Black, C201 |

|
| 2 | Google Nest Cam with Floodlight - Outdoor Camera - Floodlight Security Camera, White, 1 Count (Pack of 1) |
|
| 3 | 2K No Drill Window Camera-2 Pack 2.4Ghz & 5Ghz WiFi Cameras for Home Security for Indoor & Outdoor Monitoring, Anti-Glare Color Night Vision, Human Detection, 24/7 Recording, Ideal for Apartment, K1 |
|
| 4 | Google Nest Cam Outdoor (Wired, 2nd Gen) - 2 Pack - Security Camera with 2K Video and Gemini, Night Vision, 2-Way Audio - Works with Google Home - 2025 Model - Snow |
|
| 5 | Tapo 2K+ Indoor/Outdoor Wired Security Camera - 2024 PCMag Editors' Choice, Person/Pet/Vehicle Detection, Baby Monitoring, Color Night Vision, Subscription-Free Local Storage or Optional Cloud, C120 |
|
| 6 | WYZE Cam Pan v3 Indoor/Outdoor IP65-Rated 1080p Pan/Tilt/Zoom Wi-Fi Smart Home Security Camera with Color Night Vision, 2-Way Audio, Compatible with Alexa & Google Assistant, White, 2-Pack |
|
| 7 | TP-Link Tapo 1080P Indoor Security Camera for Baby Monitor, Dog Camera w/Motion Detection, 2-Way Audio Siren, Night Vision, Cloud & SD Card Storage, Works w/Alexa & Google Home (Tapo C100) |
|
| 8 | aosu Security Cameras Outdoor Wireless, 4 Cam-Kit, No Subscription, Solar-Powered, Home Security Cameras System with 360° Pan & Tilt, Auto Tracking, 2K Color Night Vision, Easy Setup, 2.4 & 5GHz WiFi |
|
| 9 | WYZE Bulb Cam Security Camera, 2K HD Outdoor Light Bulb Camera, Color Night Vision, Dimmable LED Bulb, Motion Detection, Siren Alarm, Works w/Alexa/Google Assistant. Free Expert Support |
|
| 10 | 2K Cameras for Home Security-Outdoor/Indoor Camera for Dog/Cat/Pet/Nanny/Baby/Elderly, Color Night Vision, White Light, Siren, 24/7 SD Recordings, Works with Alexa, Plug in (C1-White-2pack-2.4G) |
|
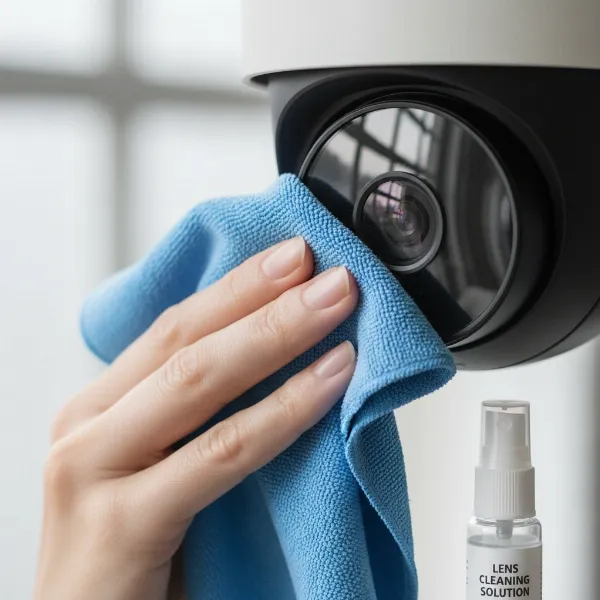 A person gently cleaning a security camera lens with a microfiber cloth and lens cleaning solution, emphasizing scratch-free technique
What to Avoid: Common Mistakes and Harmful Products
Knowing what not to use is as important as knowing what to use. Avoid these common cleaning pitfalls:
- Abrasive Materials: Never use paper towels, tissues, napkins, your shirt, or any other rough cloth. These materials contain wood fibers that are abrasive and can easily scratch the delicate lens surface and its coatings.
- Harsh Chemicals: Steer clear of household glass cleaners (like Windex), window sprays, or cleaners containing alcohol, ammonia, or other strong solvents. While some lens cleaning solutions may contain isopropyl alcohol, household cleaners are too aggressive and can strip away protective coatings, leading to permanent cloudiness, discoloration, or damage.
- Spraying Directly onto the Lens: Always apply cleaning solutions to your microfiber cloth first. Spraying liquid directly onto the lens risks moisture seeping into the camera’s internal electronics or damaging seals, especially if the camera isn’t fully waterproof.
- Excessive Pressure: Wiping or scrubbing too hard can scratch the lens or damage its anti-reflective coatings. Be gentle at all times.
- Blowing with Your Mouth or Unfiltered Compressed Air: Blowing with your mouth can introduce saliva and moisture onto the lens, while some canned compressed air may contain propellants that can leave residue or even frost the lens if used too closely. A dedicated air blower is always safer.
- Your Fingers: The natural oils and dirt on your fingertips can leave smudges and residues that are difficult to remove.
Step-by-Step Guide: Cleaning Your Security Camera Lens Gently
Follow these steps for a thorough and scratch-free cleaning:
1. Safety First: Disconnecting Power and Accessing the Camera
Before you begin any cleaning, prioritize safety. Turn off and unplug your security camera to prevent electrical hazards and protect internal electronics from accidental damage. If your camera is mounted high, use a stable ladder or cleaning pole to ensure you can reach it comfortably and safely. Avoid cleaning on windy, rainy, or snowy days to prevent injury and ensure a clean result.
2. Removing Loose Dust and Debris
This is the most crucial step for preventing scratches.
- Use an Air Blower: Gently squeeze your air blower to direct a stream of air across the entire lens surface. Hold the camera with the lens facing downwards to allow gravity to assist in removing particles. Continue until all loose dust, dirt, and spiderwebs are dislodged.
- Soft Brush (if needed): For any stubborn loose particles lodged in crevices or around the lens housing, very gently use a soft lens brush to sweep them away. Always brush lightly, and never press down on the lens.
3. Tackling Stubborn Smudges and Grime
Once loose debris is gone, you can address smudges and fingerprints.
- Apply Solution to Cloth: Place a few drops of your specialized lens cleaning solution onto a clean microfiber cloth. The cloth should be damp, not soaking wet. Alternatively, use a pre-moistened lens wipe.
- Gentle Circular Wipes: Using the dampened microfiber cloth, gently wipe the lens in a circular motion. Start from the center of the lens and work your way outwards to avoid spreading dirt. Apply minimal pressure.
- Lens Pen (for specific spots): For particularly stubborn spots or oily smudges, carefully use the carbon-cleaning tip of a lens pen with a light touch.
4. Drying and Reassembly
- Buff Dry: After cleaning, use a clean, dry section of your microfiber cloth to gently buff the lens, removing any remaining solution and preventing streaks. You can also use a hairdryer on a low, cool setting to help evaporate moisture.
- Inspect and Test: Once the lens is sparkling clean and dry, power the camera back on and check the live feed. Ensure the image is sharp, clear, and free of any new smudges or streaks. If needed, repeat the wet cleaning step with a fresh section of your microfiber cloth.
Special Considerations for Different Security Camera Types
Different camera designs might require slight adjustments to your cleaning routine.
Outdoor Cameras: Dealing with Environmental Factors
Outdoor cameras face harsher conditions. Consider installing lens hoods or shields to protect against rain and direct sun glare, which can lead to water spots and accelerated dirt buildup. Angling the camera slightly downward can also help water run off the lens more easily. Regularly trim landscaping around the camera to prevent leaves, branches, or spiderwebs from obstructing the view. Using anti-spider gel (safe for electronics) on mounts can deter insects that leave behind debris. Applying a hydrophobic coating specifically designed for lenses can also help repel water and dust.
Dome Cameras: Accessing the Lens
Dome cameras often have a protective polycarbonate or acrylic dome cover. You’ll need to clean both the outer and inner surfaces of this dome, as well as the actual camera lens inside. Use a separate clean microfiber cloth or a different section of your existing cloth for the dome to avoid transferring any grit from the exterior to the lens. Ensure the dome is perfectly clear before reattaching it, as smudges on the dome can significantly affect image quality.
PTZ (Pan, Tilt, Zoom) Cameras: Moving Parts and Calibration
PTZ cameras have moving parts. While cleaning the lens, be mindful not to apply pressure that could affect the camera’s calibration or movement mechanisms. Focus solely on the lens and outer housing. If you notice any issues with movement or calibration after cleaning, consult your camera’s manual or a professional. Avoid attempting to disassemble these complex units, as it can easily damage internal components and seals.
Maintaining Lens Clarity: Beyond Just Cleaning
Proactive maintenance can extend the periods between deep cleans and ensure consistent image quality.
Regular Inspection Schedule
The frequency of cleaning depends largely on the camera’s environment.
- Outdoor cameras: Most outdoor cameras should be cleaned monthly. In particularly dusty, rainy, coastal, or construction zones, bi-weekly cleaning may be necessary.
- Indoor cameras: Indoor cameras typically require cleaning every three to six months. However, in environments with significant air pollutants, such as homes with smoking, cleaning every two to four weeks might be needed.
Regular visual inspections should prompt cleaning whenever you notice a degradation in image clarity.
Protective Measures and Environmental Factors
Consider preventive measures to minimize dirt accumulation. Ensure cameras are installed in locations that offer some protection from direct weather elements where possible. For outdoor units, specialized anti-fog solutions can be applied to the lens to prevent condensation from obscuring the view.
Troubleshooting Common Cleaning Challenges
Even with careful cleaning, you might encounter issues.
- Camera Not Connecting/Damaged During Cleaning: Always power off the camera before cleaning. If issues arise, re-check connections and ensure the camera is powered properly.
- Images Still Blurry/Smudged: This often means residue or persistent grime remains. Try another gentle cleaning pass with fresh microfiber cloths and lens solution. Ensure you are wiping from the center outward and buffing dry thoroughly.
- Moisture or Fog Inside the Lens: This indicates a compromised seal, which allows humidity to enter. This is a serious issue that typically cannot be fixed by external cleaning. You might try placing a silica gel packet near the camera if accessible to absorb moisture, but for persistent internal fogging, it’s best to contact the manufacturer or consider replacing the camera to prevent further internal damage.
- Camera Lens is Scratched: Unfortunately, once a lens is scratched, external cleaning cannot repair the damage. Minor scratches might not severely impact image quality, but deep scratches will permanently degrade performance. Depending on the camera, you might need a lens replacement or, in many cases, a full camera replacement.
| Do’s for Safe Lens Cleaning | Don’ts for Avoiding Lens Damage |
|---|---|
| Power off camera before cleaning. | Never clean a powered or hot camera. |
| Use a dedicated air blower for loose dust. | Use mouth or forceful canned air directly. |
| Use a soft lens brush for crevices. | Use abrasive materials (paper towels, shirts). |
| Apply specialized lens cleaning solution to microfiber cloth. | Spray solution directly onto the lens. |
| Wipe gently with a clean microfiber cloth. | Use household cleaners or alcohol wipes. |
| Wipe in circular motions, center outwards. | Apply excessive pressure or scrub aggressively. |
| Clean regularly based on environment. | Over-clean unnecessarily; too much can damage. |
“Proper security camera maintenance, including regular and gentle lens cleaning, is crucial not only for optimal image clarity but also for extending the lifespan of your valuable surveillance equipment.” – Jane Doe, Certified Security System Technician
Conclusion
A clean security camera lens is fundamental to maintaining an effective and reliable surveillance system. Just a few minutes of careful attention every few months can make a significant difference in video clarity, ensuring you capture the sharp, detailed footage necessary for monitoring, protection, and peace of mind. By using the right tools, following a gentle step-by-step process, and avoiding harmful practices, you can protect your security camera’s delicate lens coatings and extend its operational life. Don’t let a blurry lens compromise your security; prioritize this simple yet impactful maintenance task. What steps will you take today to ensure your security camera has a crystal-clear view?
Frequently Asked Questions
How often should I clean my security camera lens?
The frequency depends on the camera’s environment. Outdoor cameras typically need monthly cleaning, or even bi-weekly in dusty or harsh conditions. Indoor cameras can usually go 3-6 months between cleanings, but might require more frequent attention in areas with high airborne particles or smoking.
Can I use household glass cleaner on my security camera lens?
No, it is strongly advised to avoid household glass cleaners like Windex or alcohol-based wipes. These products contain harsh chemicals like ammonia that can damage the delicate protective coatings on your camera lens, leading to permanent cloudiness, discoloration, or reduced image quality. Always use a cleaning solution specifically designed for optical lenses.
What if my camera lens is scratched?
Unfortunately, external cleaning cannot repair a scratched lens. Minor scratches might not significantly impact performance, but deeper scratches will permanently degrade image quality. Depending on the severity and camera model, you may need to consider a lens replacement, or in many cases, replacing the entire camera unit for optimal surveillance.
Is it safe to clean the inside of my security camera lens?
No, it is generally not safe for DIY users to clean the inside of a Security Camera lens. Disassembling your camera can damage delicate internal components, compromise factory seals (leading to moisture ingress), and often voids the manufacturer’s warranty. This type of intricate work is best left to professional technicians.